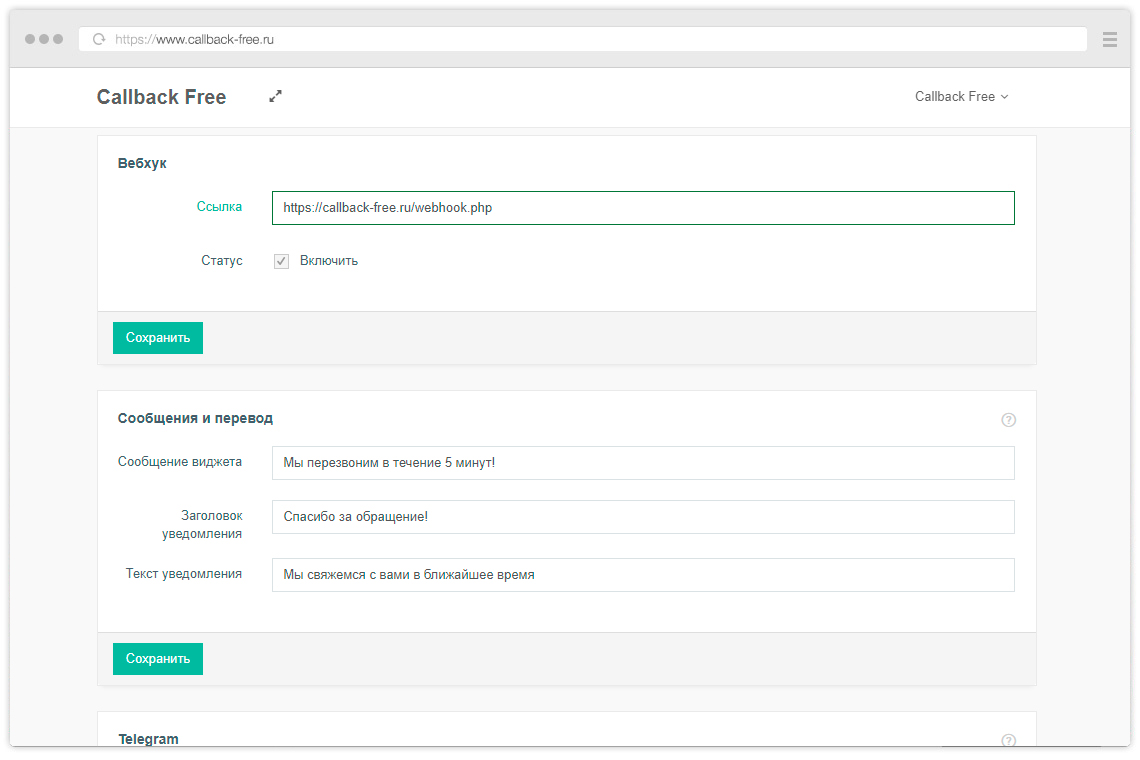
The Callback Free servicenow allows you to transfer information about the ordered callback to external systems. The data transfer is carried out using a webhook, which you can configure in your personal account. Specify in your personal account the URL address of the script in which you plan to receive information and check the “Enable” box.

After that, POST requests will be sent to the specified URL with each callback order. Requests contain the following information:
- timestamp – date and time of the callback order in timestamp format
- user_agent – User-agent of the user who left the callback order
- referrer_url – referrer (the page from which the transition was made to the site on which the Callback Free widget is installed)
- start_url – entry page (the page that the user initially came to on the site where the Callback Free widget is installed)
- submit_url – the order page (the page on which the callback order was made)
- phone – the user’s phone number specified when ordering a call back
- IP – the IP-address of the user who left the callback request
Let’s look at an example of use:
<?php
    $log = "New callback request\n";
    $log .= "Time: ".$_POST['timestamp']."\n";
    $log .= "User-agent: ".$_POST['user_agent']."\n";
    $log .= "Referrer: ".$_POST['referrer_url']."\n";
    $log .= "Entry page: ".$_POST['start_url']."\n";
    $log .= "Application page: ".$_POST['submit_url']."\n";
    $log .= "Phone: ".$_POST['phone']."\n";
    $log .= "Sender IP:: ".$_POST['ip']."\n";
    $log .= "- - -\n\n"
    $f = fopen('log.txt', 'a');
    fwrite($f, $log);
    fclose($f);
?>
In this example, all information about the ordered call that came to Webhook is saved to a file, you can use it, for example, to transfer it to your CRM system. Below we will take a look at integration with CRM using Bitrix24 as an example.
CallBack Free integration with Bitrix24
We will tell you how to connect a CallBack Free service from the site to CRM Bitrix24. First of all, we need to create another webhook, but this time on the side of Bitrix 24. Log in to your Bitrix24, specify “Webhooks” in the general search and go to the appropriate section.

Add “Incoming Webhook” and allow access to the “CRM” module.

For further work, we need the REST API key (it is highlighted in the screenshot below).

Place the following code in the script located at the address that specified in your Callback Free account, changing the bx_url, bx_user, bx_key and bx_manager parameters.
<?php
// Bitrix24 settings
$bx_url = "https://callback-free.bitrix24.ru"; //Address of your Bitrix24
$bx_user = 1; //User ID on behalf of whom the Webhook was created
$bx_key = "21uir21jcn923"; //REST API key
$bx_manager = 1; //ID of the manager to whom the request will be assigned
$bx_source = "CALLBACK"; //source ID (in our case - callback order)
// Get the parameters
$phone = $_POST['phone'];
$submit_url = $_POST['submit_url'];
$start_url = $_POST['start_url'];
// Get UTM tags
$utm_source = "";
$utm_medium = "";
$utm_campaign = "";
$utm_content = "";
$utm_term = "";
function unhtmlspecialchars($string){
$string = str_replace ( '&', '&', $string );
$string = str_replace ( ''', '\'', $string );
$string = str_replace ( '"', '"', $string );
$string = str_replace ( '<', '<', $string ); $string = str_replace ( '>', '>', $string );
$string = str_replace ( '%7C', '|', $string );
return $string;
}
if ($start_url != "unset"){
$utm_url = parse_url($start_url);
if (isset($utm_url['query'])){
$query = $utm_url['query'];
$query = explode('&', $query);
foreach($query as $param){
list($utm_name, $utm_value) = explode('=', $param, 2);
if ($utm_name == "utm_source"){
$utm_source = urldecode($utm_value);
} elseif ($utm_name == "utm_medium"){
$utm_medium = urldecode($utm_value);
} elseif ($utm_name == "utm_campaign"){
$utm_campaign = urldecode($utm_value);
} elseif ($utm_name == "utm_content"){
$utm_content = urldecode($utm_value);
} elseif ($utm_name == "utm_term"){
$utm_term = urldecode($utm_value);
}
}
}
}
// Sending an application to Bitrix24
$queryUrl = "$bx_url/rest/$bx_user/$bx_key/crm.lead.add.json";
$queryData = http_build_query(array(
'fields' => array(
"STATUS_ID" => "NEW",
"OPENED" => "Y",
"ASSIGNED_BY_ID" => $bx_manager,
"SOURCE_ID" => $bx_source,
"SOURCE_DESCRIPTION" => $submit_url,
"PHONE" => array(array("VALUE" => $phone, "VALUE_TYPE" => "WORK" )),
"COMMENTS" => "The user left a request for a call back ",
"UTM_CAMPAIGN" => $utm_campaign,
"UTM_CONTENT" => $utm_content,
"UTM_MEDIUM" => $utm_medium,
"UTM_SOURCE" => $utm_source,
"UTM_TERM" => $utm_term
),
'params' => array("REGISTER_SONET_EVENT" => "Y")
));
$curl = curl_init();
curl_setopt_array($curl, array(
CURLOPT_SSL_VERIFYPEER => 0,
CURLOPT_POST => 1,
CURLOPT_HEADER => 0,
CURLOPT_RETURNTRANSFER => 1,
CURLOPT_URL => $queryUrl,
CURLOPT_POSTFIELDS => $queryData,
));
$result = curl_exec($curl);
curl_close($curl);
?>
Now, after submitting an application for ordering a callback on your website, the information will be automatically transferred to Bitrix24. Based on this information, a new lead will be created. At the same time, UTM tags from the login page will be saved in the lead card, and the address of the page on which the callback order was made will be added to the source description.